If you have a basement window in a window well and that well fills with water during a heavy rain, you are one bad seal away from a flooded basement. Window well flooding is one of the most common causes of basement water intrusion across the GTA, and it is also one of the easiest to fix once you understand what is actually going wrong. Here is how window well drainage works (and fails) on Toronto homes, and what a proper egress window well install looks like in 2026.
The main cause of window well flooding is failed or missing drainage at the bottom of the well. To permanently stop the flooding, the well must be excavated to the footing, fitted with a 4-inch perforated drain pipe tied to the weeping tile, filled with clear stone, and capped with a transparent polycarbonate cover.
What a window well is supposed to do
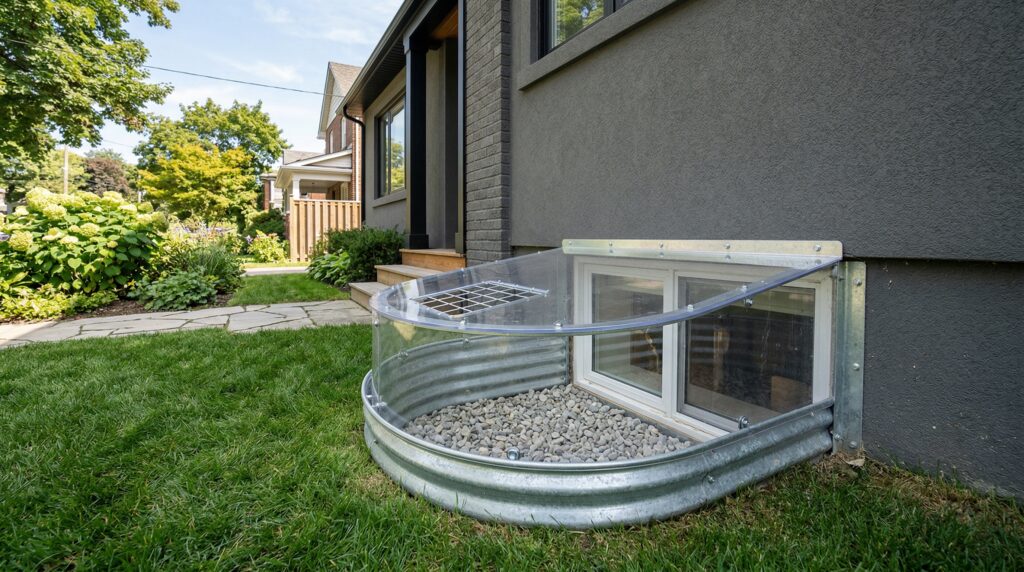
A window well is a galvanised steel or moulded plastic half-circle that holds back the earth around a basement window so the window itself sits below grade without being buried in soil. The well lets light in, lets the window open, and provides emergency egress from a finished basement bedroom. To work properly, the well needs to drain rainwater out of the bottom faster than it comes in from the top. When the drainage fails, the well becomes a bathtub against your basement window, and the only thing stopping a flood is the window seal.
Why GTA window wells flood
1. No drainage at all
Most builder-grade window wells in GTA homes from the 1970s through the 1990s were installed with no drainage tie-in. The bottom of the well sits on whatever soil happened to be there during construction. When that soil silts up and stops percolating (usually within 5 to 10 years), the well fills up in any heavy rain and the only way out is over the top or through the window.
2. Drainage tied to weeping tile that has failed
Newer wells were drained into the perimeter weeping tile around the foundation. When the weeping tile collapses or silts up (see our spring leaks post), the drain in the bottom of the well backs up. The well fills, the basement floods.
3. Surface debris
Leaves, mulch, and grass clippings build up in the bottom of the well over years. The drainage gravel turns into soil. The drain hole, if there is one, plugs solid. We have pulled wells out of GTA homes that had 18 inches of organic debris in the bottom and a perfectly intact gravel layer underneath that nobody could see anymore.
4. Grade pointing toward the well
If the soil around the well slopes toward the house instead of away, every storm dumps surface runoff straight into the well from the top. Even a perfect drain at the bottom cannot keep up with that volume in a heavy rain.
How to fix a flooding window well
Quick fix: clean out and add a clear cover
For a well that floods occasionally and has not damaged the window seal yet, the cheapest fix is excavation and cleanout of the well, refresh the gravel base with 12 to 18 inches of clear 3/4 inch stone, install a transparent polycarbonate window well cover that lets light in and keeps rain and debris out. Total cost in 2026 GTA: $300 to $700 per well, plus the cover at $80 to $200.
Permanent fix: drain tie-in and full rebuild
For chronic flooders, the well has to come out, the bottom has to be excavated to footing depth, a new 4 inch perforated drain pipe gets installed and tied directly into either the weeping tile or a dedicated dry well, the bottom is filled with 18 inches of clear stone, and the well is reinstalled with a new heavy-gauge galvanised liner. Cost in 2026 GTA: $1,500 to $3,500 per well depending on depth and discharge routing.
Egress upgrade for a legal basement apartment
If you are converting your basement into a legal secondary suite under Ontario Building Code requirements, the bedroom window must meet egress dimensions: minimum unobstructed opening of 0.35 square metres with no dimension less than 380 mm. That almost always means a larger window, a larger well, and a properly engineered drainage tie-in. Cost for a full egress window plus engineered well plus drainage in 2026 GTA: $4,500 to $8,500 per window depending on whether structural lintel work is required.

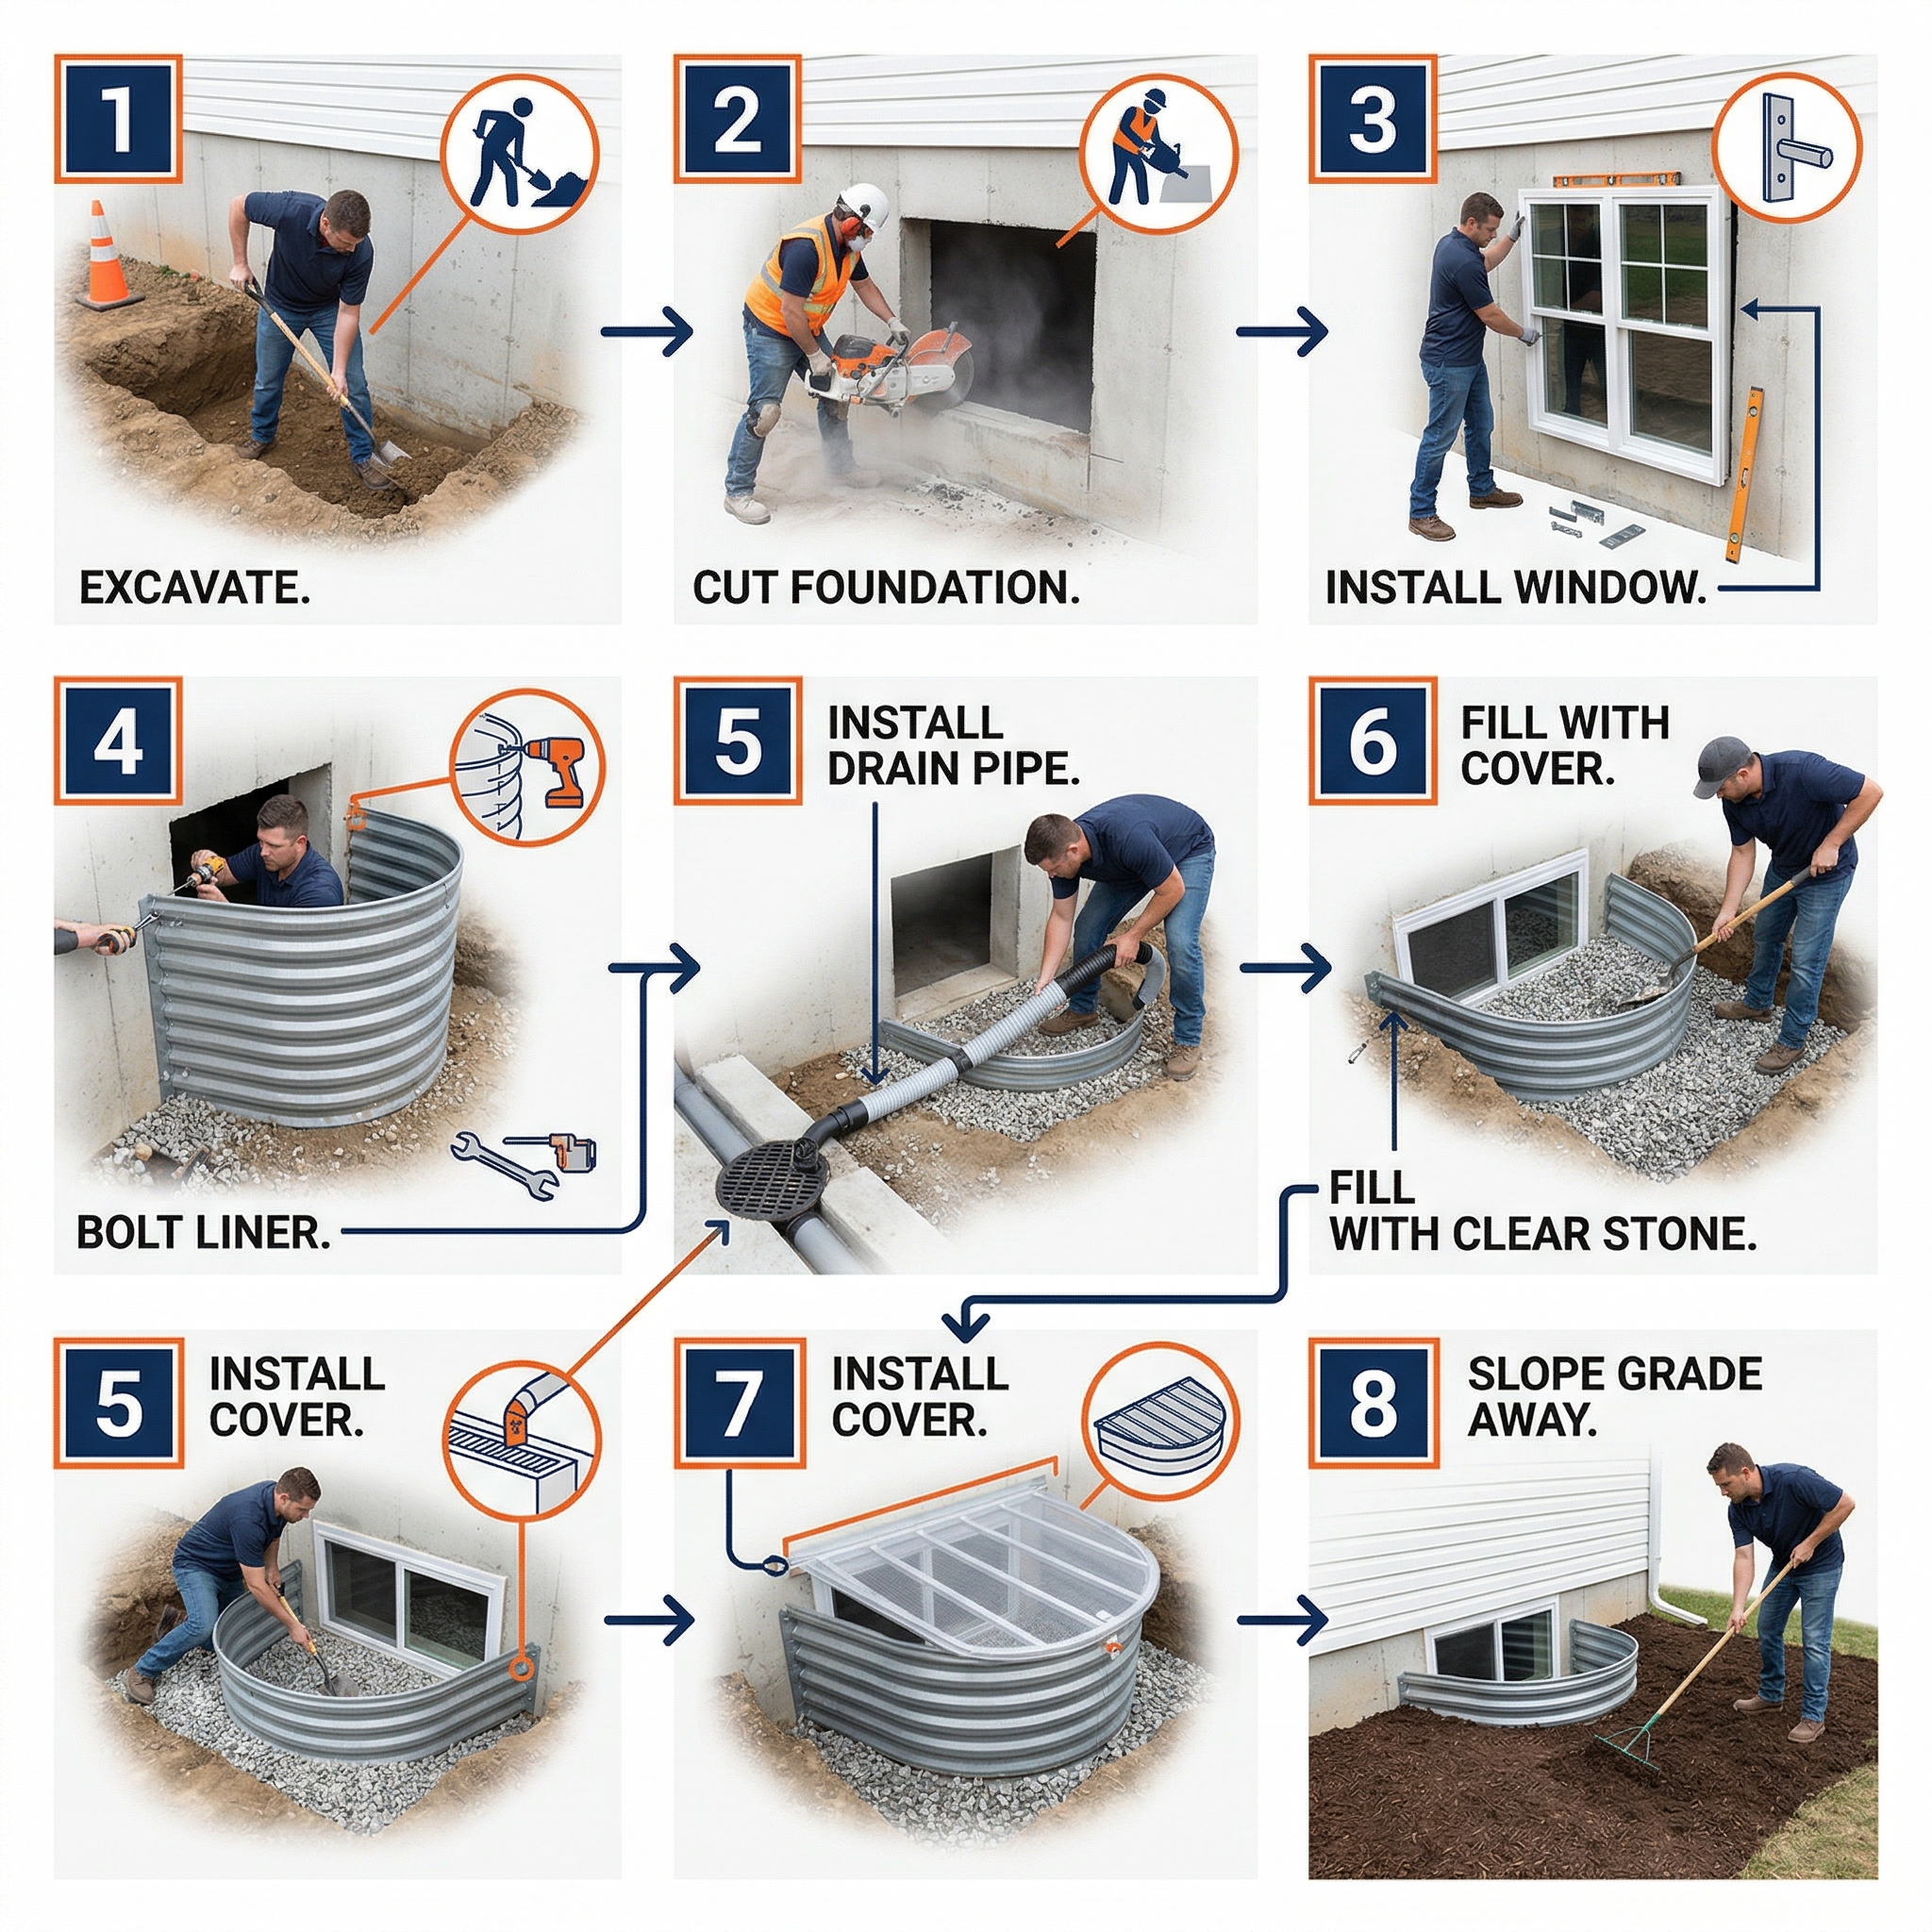
What a proper egress window well install looks like
- Excavate the existing well or the new opening to footing depth, 18 inches deeper than the bottom of the new window.
- Cut the foundation wall to receive the new larger window if upgrading to egress size. This requires a structural lintel above the cut and engineer sign-off for any opening wider than 36 inches.
- Install the new window with proper flashing, sealant, and exterior brick mould.
- Build the well: bolt the galvanised liner to the foundation with concrete anchors at 16 inch spacing top and bottom.
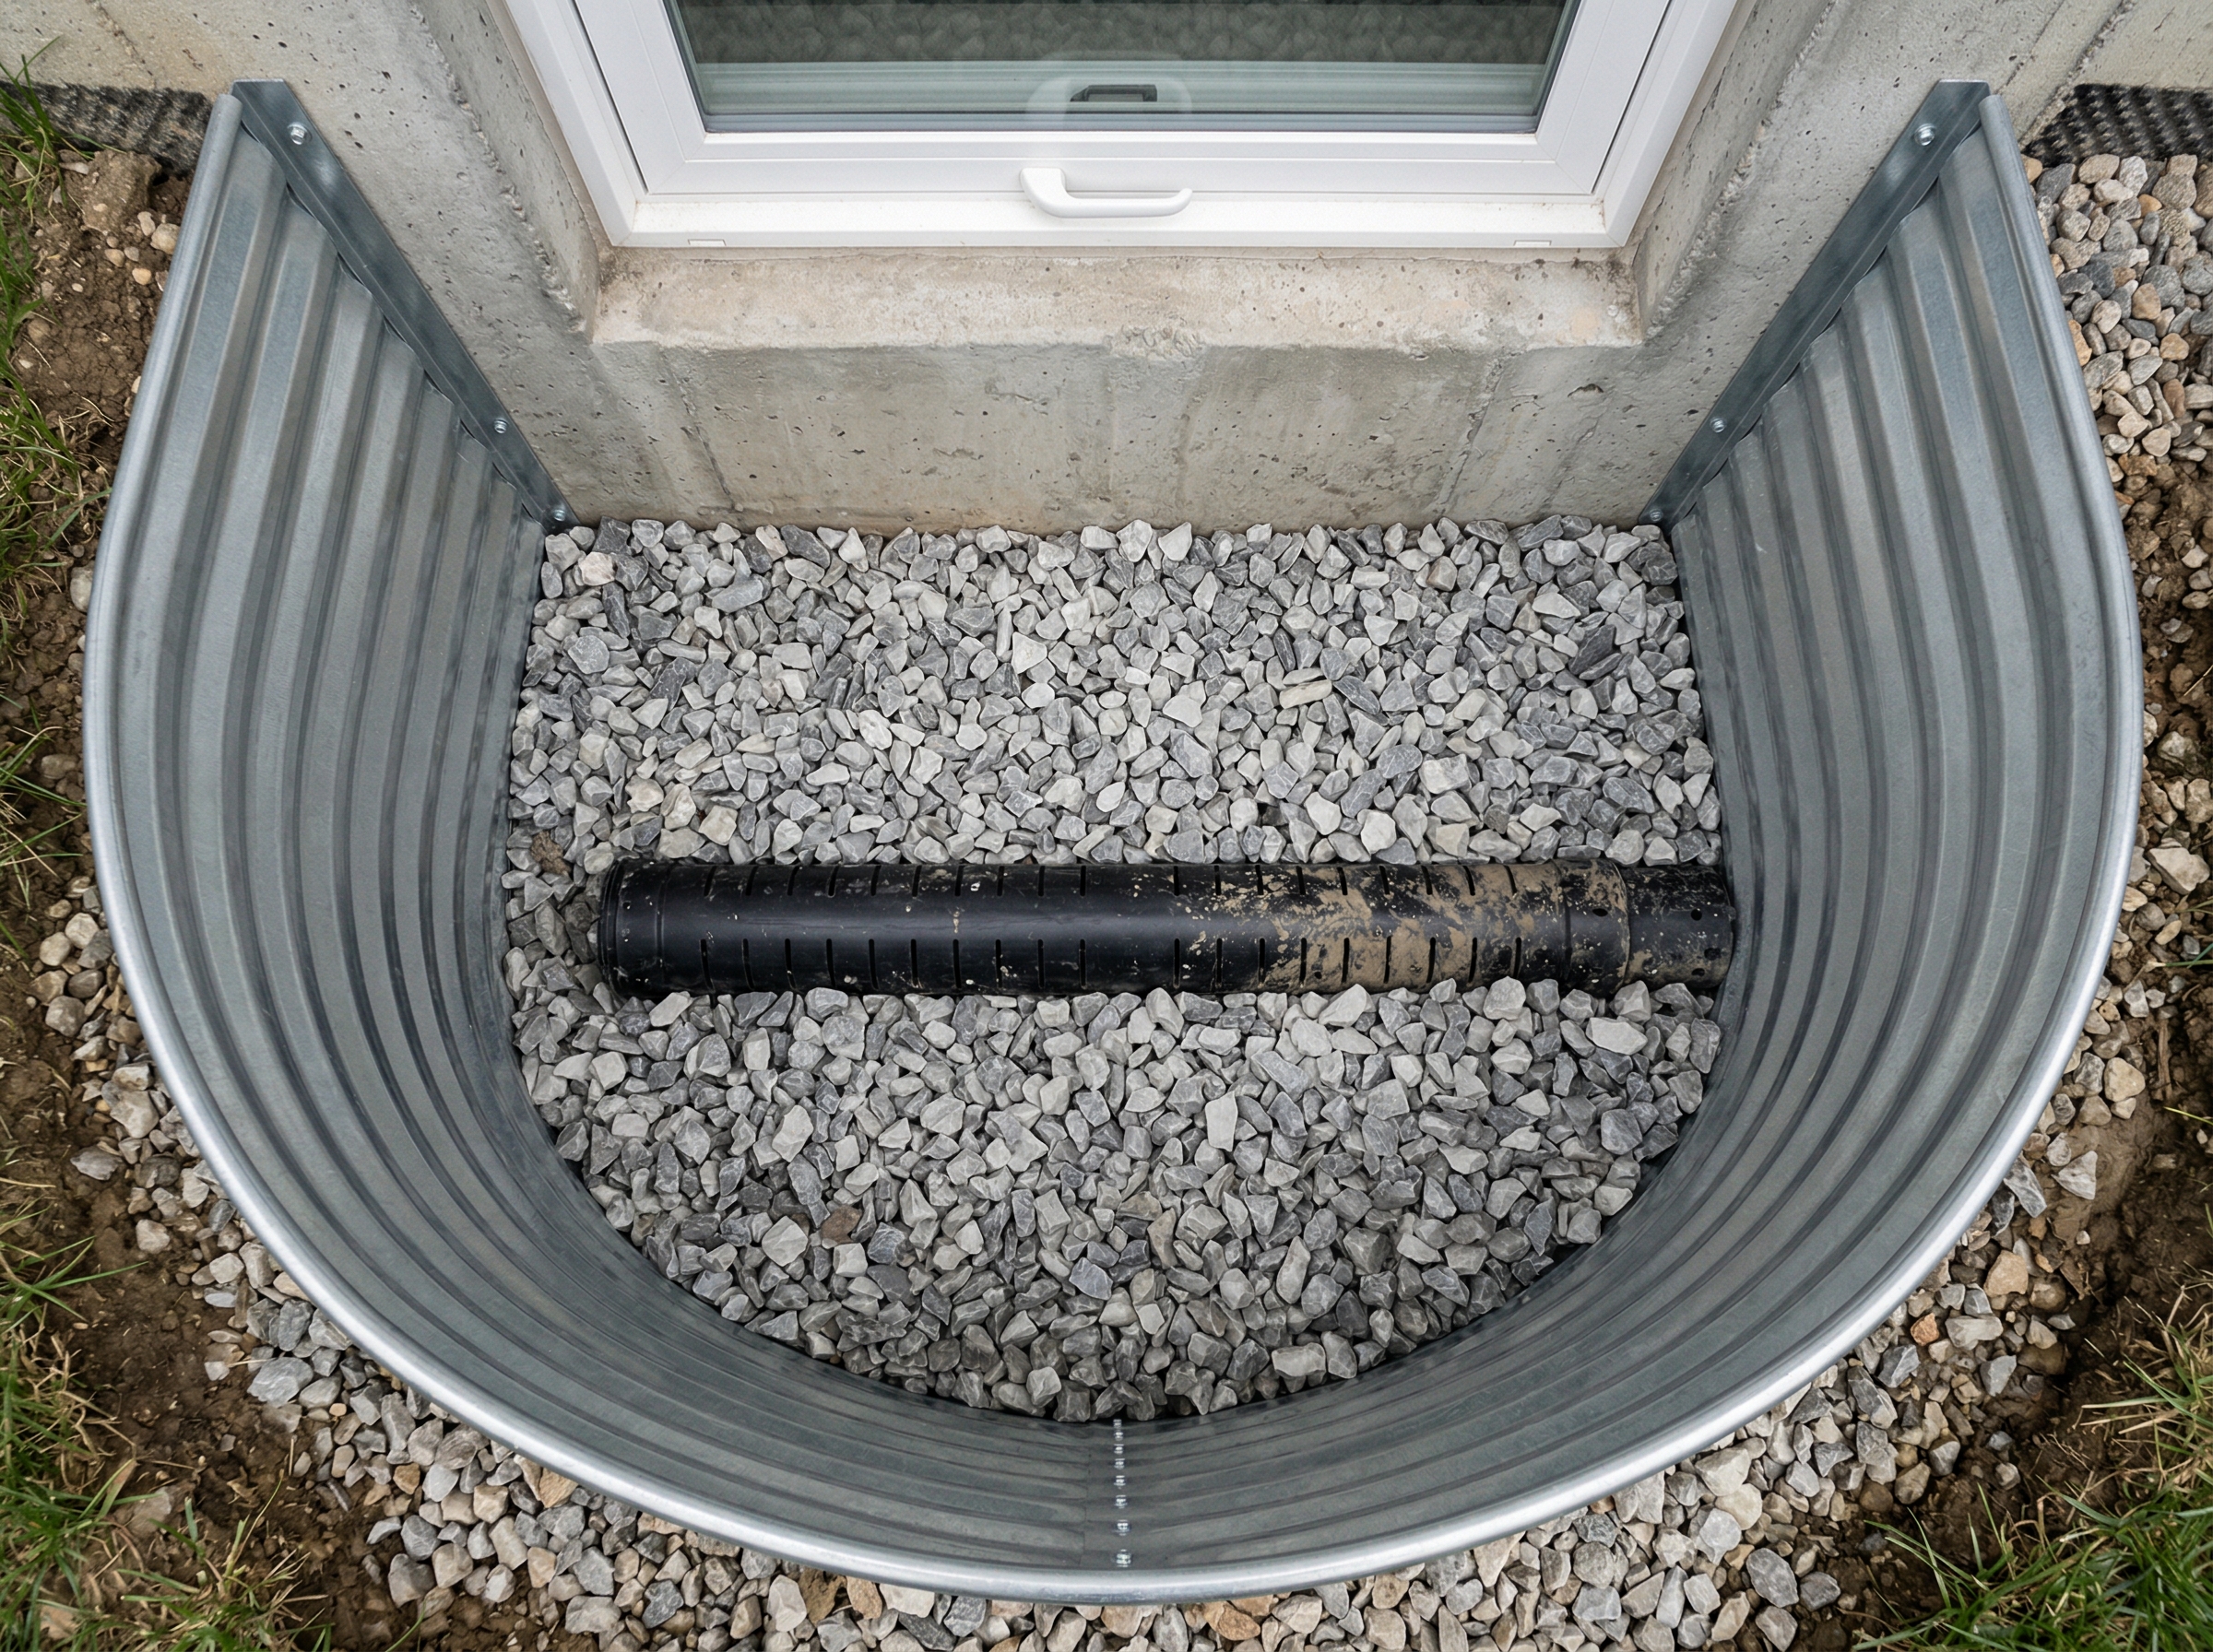
- Drain: 4 inch perforated PVC laid in the bottom of the well, wrapped in filter fabric, sloped to discharge into the existing weeping tile or to a new dry well 6 feet from the foundation.
- Stone: 18 inches of clear 3/4 inch stone over the drain pipe, no soil or fines.
- Cover: clear polycarbonate well cover sized to the well, secured against wind lift.
- Grade: backfill around the well so the surface slopes away from the foundation at 5 percent for the first 6 feet.
Frequently asked questions
Is a window well cover enough to stop the flooding?
Can I tie the window well drain into my sump pit?
Does my basement bedroom need an egress window?
How long does a window well replacement take?
What is the warranty on a properly installed window well system?
Get a window well that drains before next spring melt
The most expensive window well repair in the GTA is the one you skip this fall and rebuild next May after a flood. request a free inspection and we will inspect every well on your home, check the drainage, and either clean it out, rebuild it, or upgrade it to legal egress, depending on what your basement actually needs.

Written by
Aleksandra N.
Interior Drainage and Sump System Designer
Aleksandra designs interior basement drainage systems, sump pump assemblies, and battery backup setups for GTA homes that cannot be excavated. Civil technologist out of George Brown, specialty in residential hydrology. Spec'd more than 1,800 sump systems across the city and personally tests every backup pump before sign-off.